

Whether you're a new filmmaker, content creator, or someone who simply wants to enhance their video-making skills, understanding manual camera settings is key to achieving professional-looking footage. This guide breaks down key concepts to help you gain a base understanding of these settings and set you up to utilize them in a creative way to achieve your artistic vision.

Credits to @bleachfilm
ISO (International Organization for Standardization)
ISO controls your camera’s sensitivity to light. On most cameras, the ISO settings typically range between 100 and 3200. When deciding on the appropriate ISO setting, you should evaluate the lighting conditions of your scene, considering both the amount of light and the desired detail you wish to capture. In bright, well-lit settings, use a low ISO (100-200) to make your camera less sensitive to light and capture an accurate amount. In low-light conditions, use a higher ISO (800-900) to make the camera more sensitive to light and capture enough for visibility.
Bright Lighting = Low ISO
Dark Lighting = High ISO

A very high ISO of 3200 vs a low ISO of 200
Noise in video: An important factor of ISO to be mindful of is the higher the ISO, the more visual noise there is decreasing the quality of your image. This is where using F-stops and shutter angles to balance with the ISO can come in handy.
F-Stop: Focal Length
F-stop controls the aperture in your lens, which controls how much light is let through as well as your depth of field. F-stop is represented as f/#.
Low number (ex: f/1.6) = aperture wide open = more light let in = shallow depth of field (blurred background, focused subject)
High number (ex: f/22) = aperture very small = less light let in = deep depth of field (entire image in focus)

Deep depth of field (high f-stop) vs Shallow depth of field (low f-stop)
So, if you're filming a very bright scene, use a higher f-stop like f/22 to let in less light, preventing overexposure. This will keep most of the image in focus. On the other hand, if you’re shooting a scene where you want to focus on a particular aspect, such as a face or a small object with a blurred background, you should use a lower f-stop.
Shutter Angles
Shutter angle controls how long the camera's shutter stays open for when shooting each frame, affecting the amount of light and movement captured. Measured in degrees, a larger angle means more time with the shutter open, letting in more light and creating a brighter but blurrier image. Conversely, a smaller angle means less time with the shutter open, creating a darker but sharper image, good for fast-moving objects. You often choose the shutter angle based on how you want the footage to look creatively, adjusting it to achieve the desired brightness and motion blur.
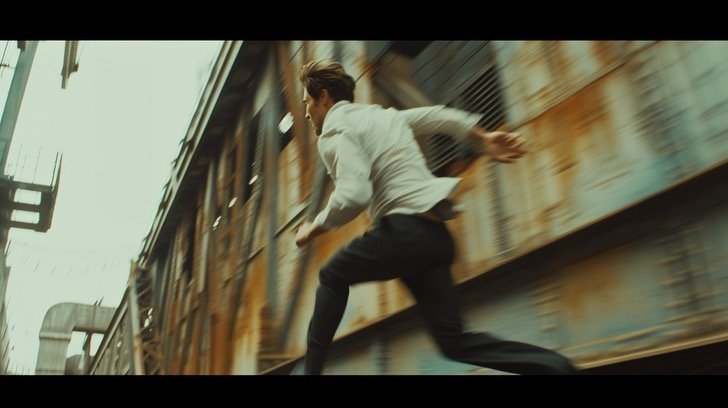
An example of using a normal shutter angle (180 degrees) to capture a high speed scene, resulting in motion blur.
Neutral Density (ND) Filters

An ND filter is a physical filter that you insert in front of your camera lenses when shooting a video. For a very bright or over-exposed day, ND filters are used to dim or balance out the light without having to perfect your manual settings.

An ND filter is used here to lower the f-stop without affecting the shutter angle, allowing you to achieve a shallower depth of field (blurry background) when shooting video.
They come in various strengths measured in stops (e.g., ND2, ND4, ND8), indicating the degree to which they reduce light. A higher ND number means more light is blocked, made for situations where you may want to use wider apertures (f/1.6) in bright conditions.

ND filter vs no ND filter
In other words, an ND filter is like sunglasses for your camera.
